“TrailBlazers” Sugar Cookies

I’m here today with another Blazer-centric recipe for you all!

IMG_6562

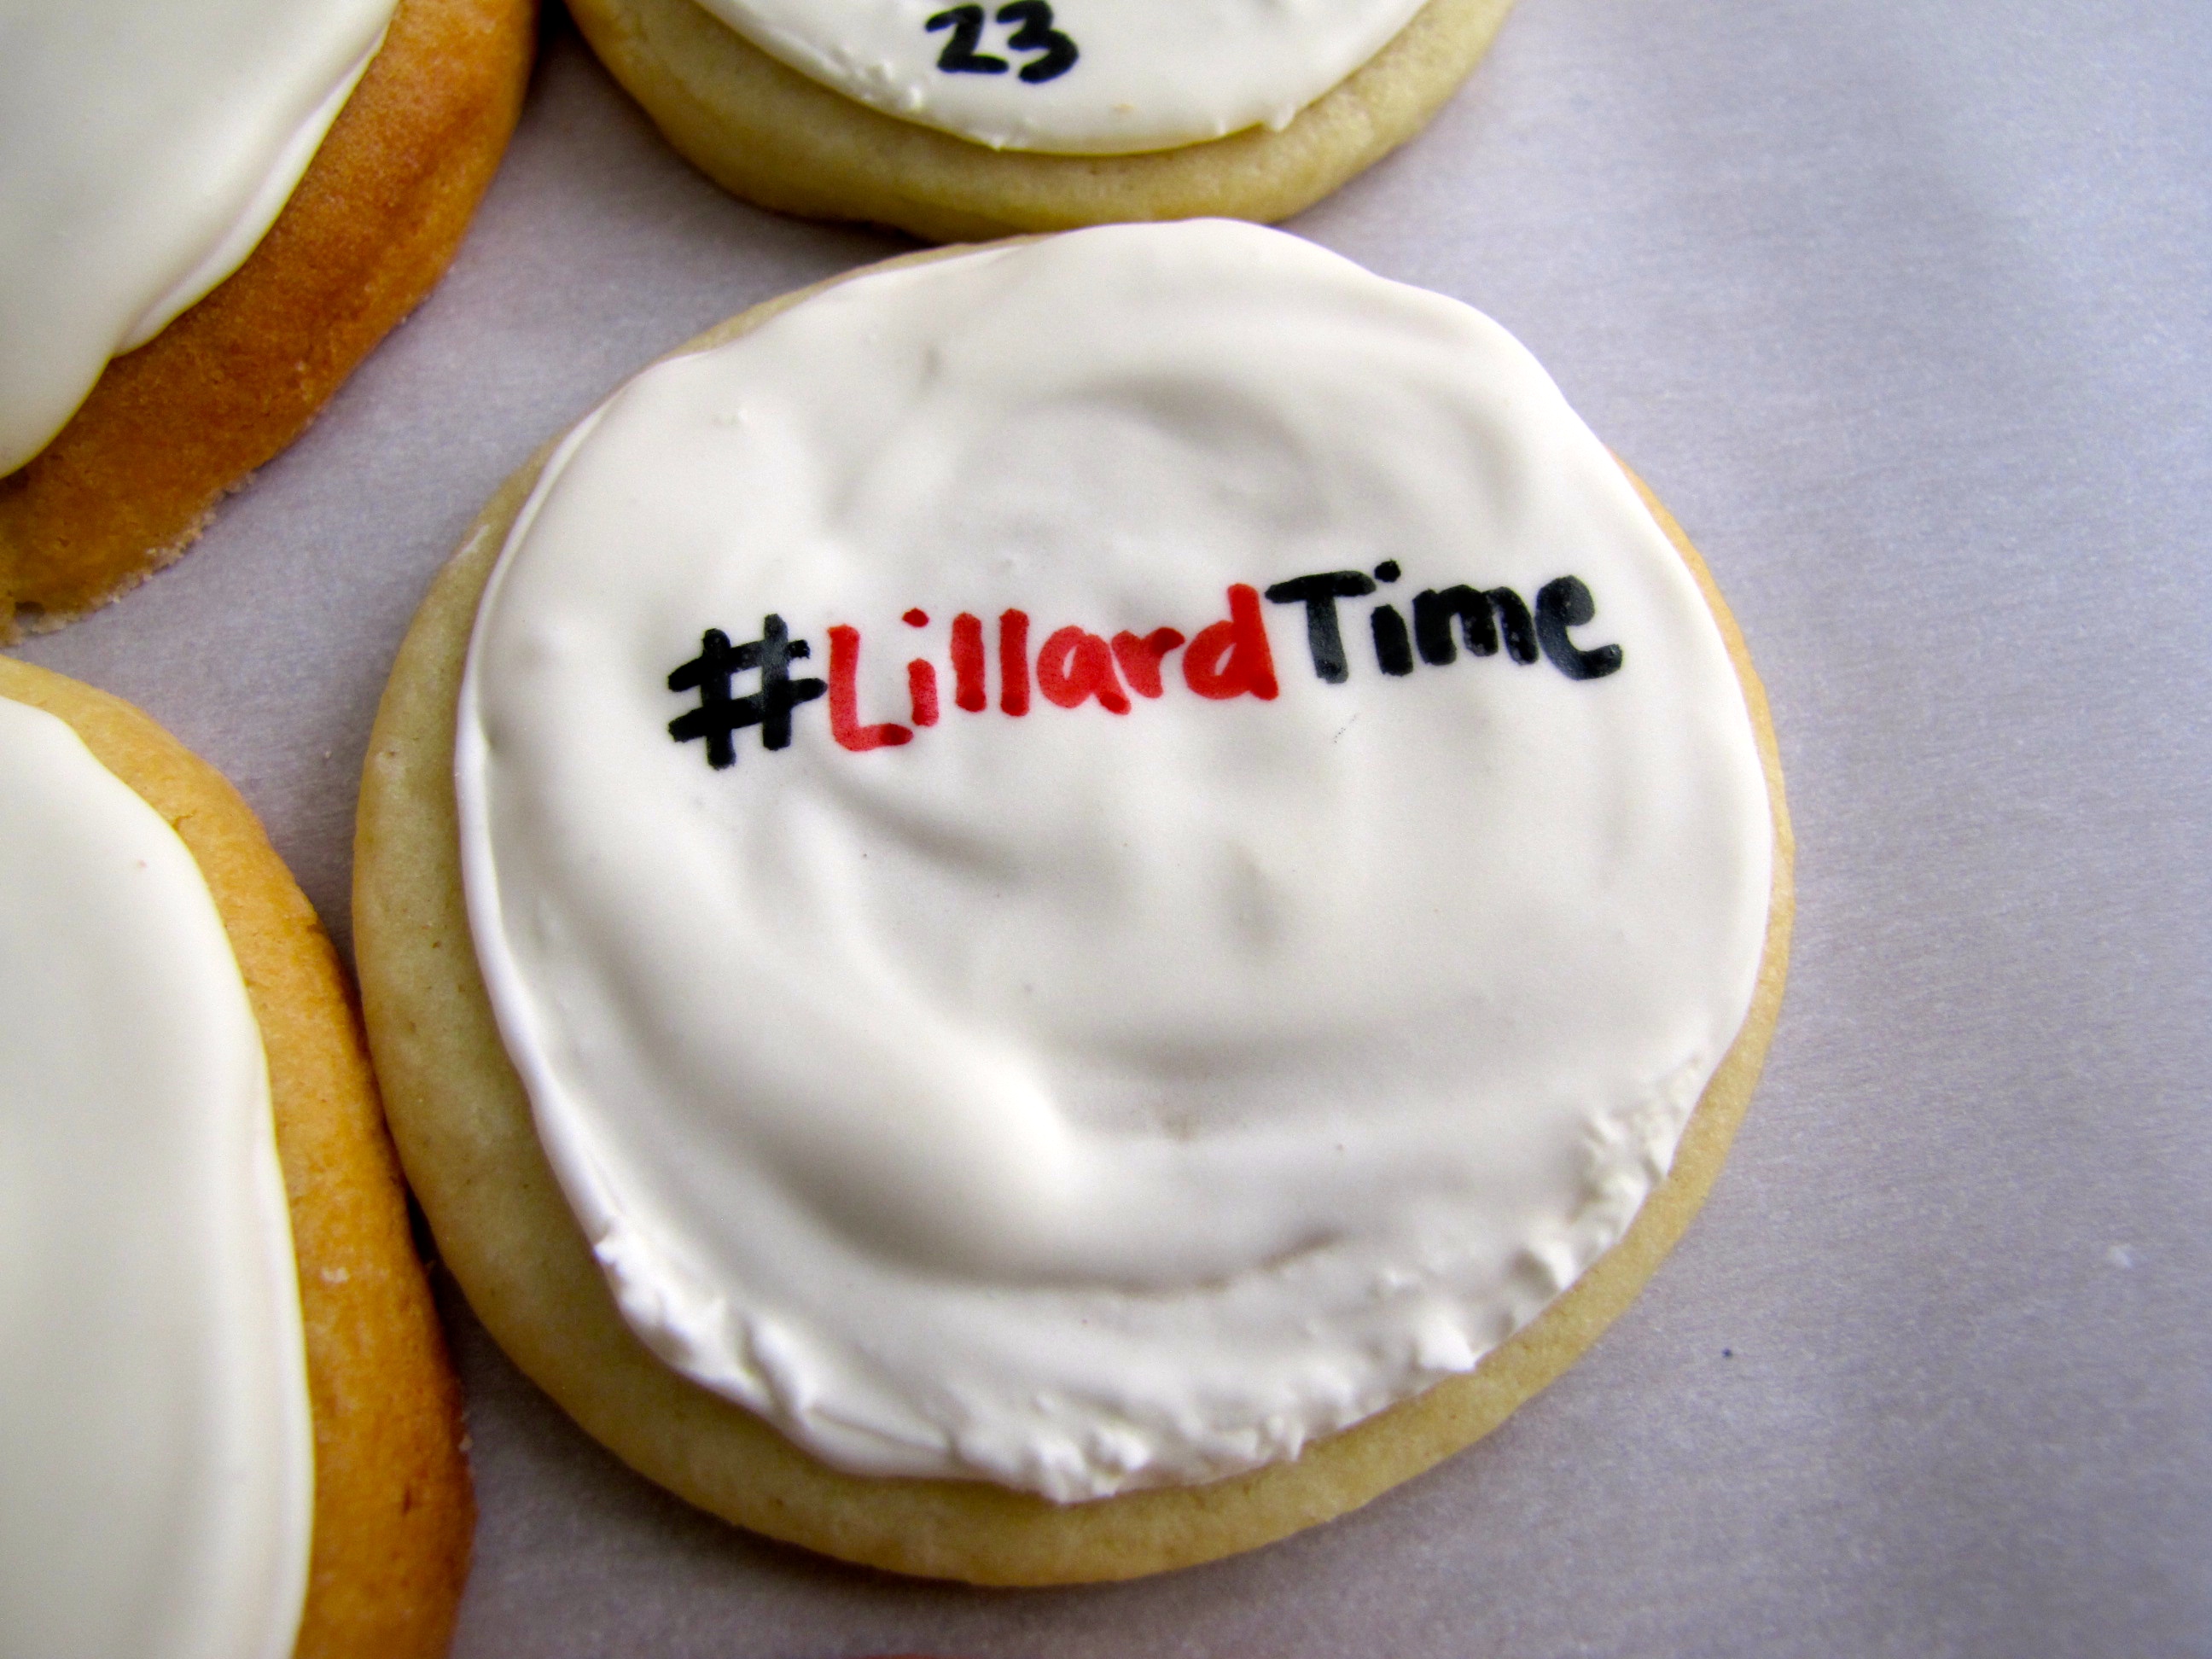
Okay, it’s not really Blazer-centric. But for my purposes it was. A soft pillowy sugar cookie topped with royal icing and Blazer doodles on top. I might have to go get one right now.

And I’m back. Yum.

IMG_6565

These cookies are absolutely the easiest little guys to make. Mix together the dough, refrigerate it for an hour, roll it out, cut out your shapes and bake. You can top them with any kind of icing/frosting you want to. I went with royal icing because it gets really hard when it dries so it was easy for me to write on them.

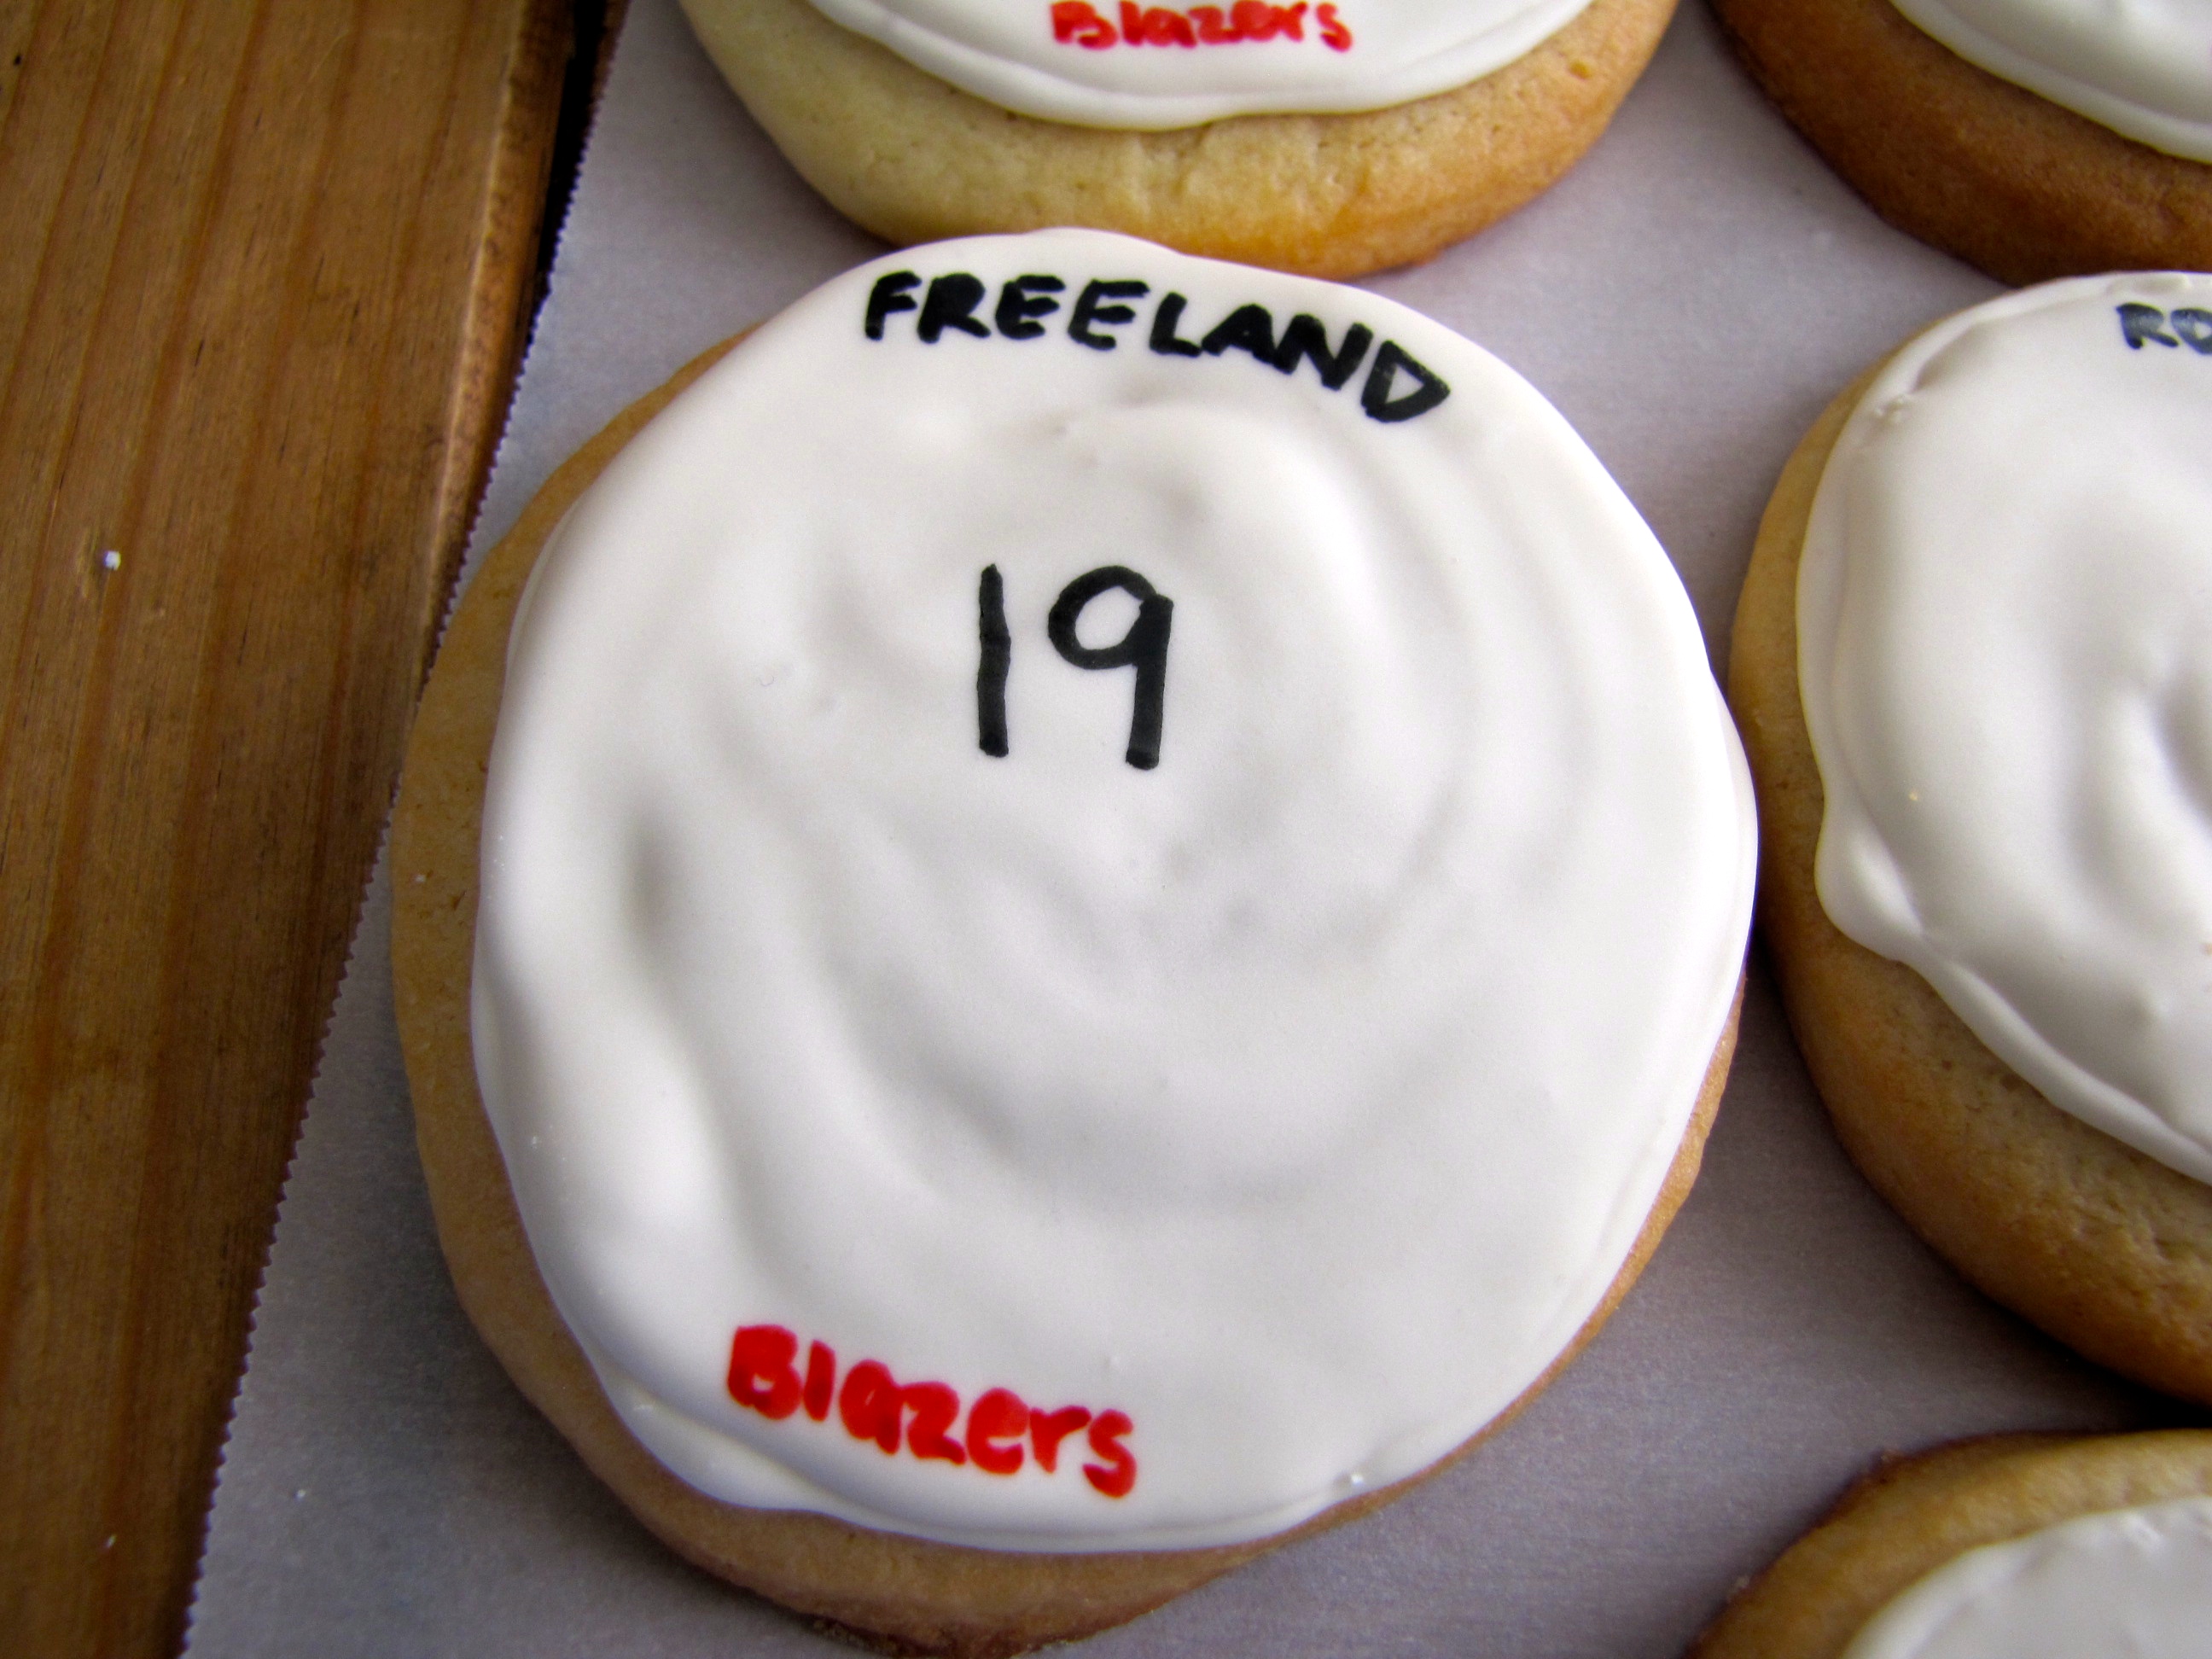
Before you think I whipped out my sharpies and used those, let me tell you I didn’t. I have some edible markers made just for drawing decorations on cookies, cakes, etc. and I used those. Perfectly safe to eat, making these cookies more than just a pretty face.

IMG_6564

These will be perfect for you to eat while you’re watching the game tonight. Put some ‘rip city’ doodles on top of your cookies and chow down while you cheer on the team. I passed Joel Freeland when I was driving around with these babies yesterday and if I hadn’t been in my car I definitely would have given him the “Freeland” cookie.

IMG_6579

Here’s the recipe. The cookie recipe is mine and the royal icing comes from Alton Brown. That man knows what he’s talking about.

Happy baking!

“TrailBlazers” Sugar Cookies: 

Ingredients:

Cookies: 

  • 1 1/2 cups butter, softened
  • 2 cups sugar
  • 4 eggs
  • 2 tsp. vanilla extract
  • 5 cups all-purpose flour
  • 2 tsp. baking powder
  • 1 tsp. salt

Royal Icing: 

  • 3 ounces pasteurized egg whites
  • 1 tsp. vanilla extract
  • 4 cups confectioners’ sugar

Directions:

  1. In a large bowl, cream butter and sugar until smooth. Beat in eggs and vanilla. Stir in flour, baking powder and salt. Cover and chill for at least 1 hour.
  2. Preheat oven to 400°F. Roll out dough onto a floured surface 1/4-1/2″ thick. Cut into shapes.
  3. Bake for 6-8 minutes. Let cool completely, then decorate.
  4. In large bowl of stand mixer combine the egg whites and vanilla and beat until frothy. Add confectioners’ sugar gradually and mix on low speed until sugar is incorporated and mixture is shiny. Turn speed up to high and beat until mixture forms stiff, glossy peaks. This should take approximately 5 to 7 minutes. For immediate use, transfer icing to pastry bag or heavy duty storage bag and pipe as desired.{I threw some in a piping bag, outlined my cookies and then added a little water to the icing to thin it out and “flooded” my cookies.}
  5. Once the icing has set use edible markers (or other frosting) to decorate.

IMG_6567

IMG_6563

“Rip City” Cupcakes

If you know me at all, you’ll know how much I love my Portland Trailblazers. If I’m not in the stadium with 20,000 other people cheering on the team, I’m probably sitting at my house yelling at my tv.

photo

The team reached the playoffs this year for the first time since the 2010-2011 season and they’re currently facing the Houston Rockets in round 1. We won the first two games in Houston and lost last night at home (in overtime; I’m pretty sure I stopped breathing about halfway through the game, these games are probably not good for anyone’s blood pressure).

But don’t worry. I have a good feeling about tomorrow’s game. No one beats us twice in a row at home. No one.

Back to the cupcakes.

IMG_6547

I had a lot of fun whipping up these little babies. The Blazers team colours are red, black and white so I made good use of those when I was making these. The base for the cupcake is the same as the cupcake recipe I developed for The Oregonian on Valentine’s Day. It’s so deliciously chocolatey and if it ain’t broke don’t fix it, right?

I did double the recipe because it only makes 12 and I wanted a cupcake for each player (15) and some other Blazer-centric things. I’m not going to lie, I’m not totally happy with how the frosting turned out. I think next time I would do red/white frosting instead of red/black and have the numbers and letters in black. But you live and learn, as they say. Getting the frosting to turn black required a lot of food colouring.

IMG_6550

Yesterday I used candy melts for the first time and I’m pretty happy with the results. It’s a really easy way to make cute little decorations (or in my case, numbers and letters) to put on top of cupcakes. Melt the candy, pipe it onto some wax paper, let it set and you’re done. Easy!

I also baked up a little something else yesterday, but I’ll wait until tomorrow or Monday to post that one. Don’t want to overload you with too much goodness 😉

IMG_6557

“Rip City” Cupcakes:
Makes 12 Cupcakes

Ingredients:

Cupcakes: 

  • 1/2 cup (1 stick) unsalted butter, cut into 8 pieces
  • 2 oz. bittersweet chocolate, chopped (bittersweet chocolate chips will also work)
  • 1/2 cup dark chocolate cocoa powder (or regular, if you prefer)
  • 3/4 cup all-purpose flour
  • 1/2 tsp. baking soda
  • 3/4 tsp. baking powder
  • 2 eggs
  • 3/4 cup sugar
  • 1 tsp. vanilla extract
  • 1/2 tsp. salt
  • 1/2 cup sour cream

Frosting: 

  • 1 cup (2 sticks) unsalted butter, softened
  • 3 cups powdered sugar
  • Food colouring (I use gel so it doesn’t change the consistency)

Decorations: 

  • 1 bag candy melts

Directions:

  1. Preheat oven to 350°F. Line a muffin tin with paper liners.
  2. Combine butter, chocolate and cocoa powder in a heatproof bowl over gently simmering water. Heat until the butter and chocolate have melted, stir to combine and set aside to cool.
  3. In a small bowl, sift together the flour, baking soda and baking powder.
  4. In a larger bowl, whisk the eggs. Add sugar, vanilla and salt, stirring to combine. Add the chocolate mixture and mix together.
  5. Pour in 1/2 of the flour mixture and stir together. Whisk in sour cream, then add remaining flour mixture and whisk again until just combined. Do not over mix. Divide batter between liners and bake for 18-20 minutes. Let cool.
  6. To make the frosting, cream the butter. Slowly add the powdered sugar and mix together until combined. Divide frosting in half and use food colouring to dye it.
  7. To get the swirl effect that I have, place one batch of frosting in a 12″ pastry bag and the other batch in another 12″ bag. Cut off the tips of the bags. Place both bags into a 16″ pastry bag fitted with a star tip. Pipe onto cupcakes.
  8. For the candy melts: place in a plastic decorating bag or ziploc and put in microwave for 1 minute. Squeeze bag and put back in microwave, checking and squeezing the bag every 30 seconds until the candy has all melted. Snip off the end of the bag/corner of ziploc and pipe desired shapes onto wax paper. Allow to set for at least two hours. Place on top of frosted cupcakes.

IMG_6561

IMG_6558