The Very Best Shortbread

IMG_1132

By now you’ve probably heard of the Great British Baking Show (or Great British Bake Off if you’re in England).

It’s a fun, laid-back baking competition filled with beautiful bakes and some silly innuendoes. The two judges are two prominent British bakers/chefs, Paul Hollywood and Mary Berry.

IMG_1070

In my opinion, Mary Berry is a British national treasure. I just love her. She’s funny and a little sassy and she and Paul Hollywood play off each other perfectly.

They’ve tried to recreate the show over here. It didn’t work. It was hard to watch.

Anyway…

IMG_1049

I have a book of her’s filled with 100 recipes for bakes and cakes. I was looking for a killer shortbread recipe and I stumbled upon her recipe for “The Very Best Shortbread”.

I’m always skeptical when something is called “the very best…”. But this is Mary Berry, national treasure, and she has never steered me wrong before so I made her shortbread.

IMG_1127

Best decision I’ve ever made.

These are perfectly buttery and have a little extra crunch because she uses a combination of flour and semolina.

Genius.

IMG_1131

The Very Best Shortbread:
A Mary Berry Recipe

Ingredients:
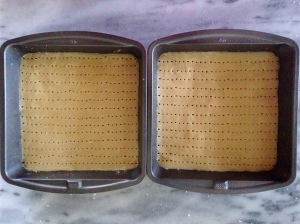
 You’ll need a 12″ x 9″ roasting pan or two 8″ x 8″ cakes pans

  • 8 oz. all-purpose flour
  • 4 oz. semolina
  • 8 oz. unsalted butter, cold and cubed
  • 4 oz. sugar
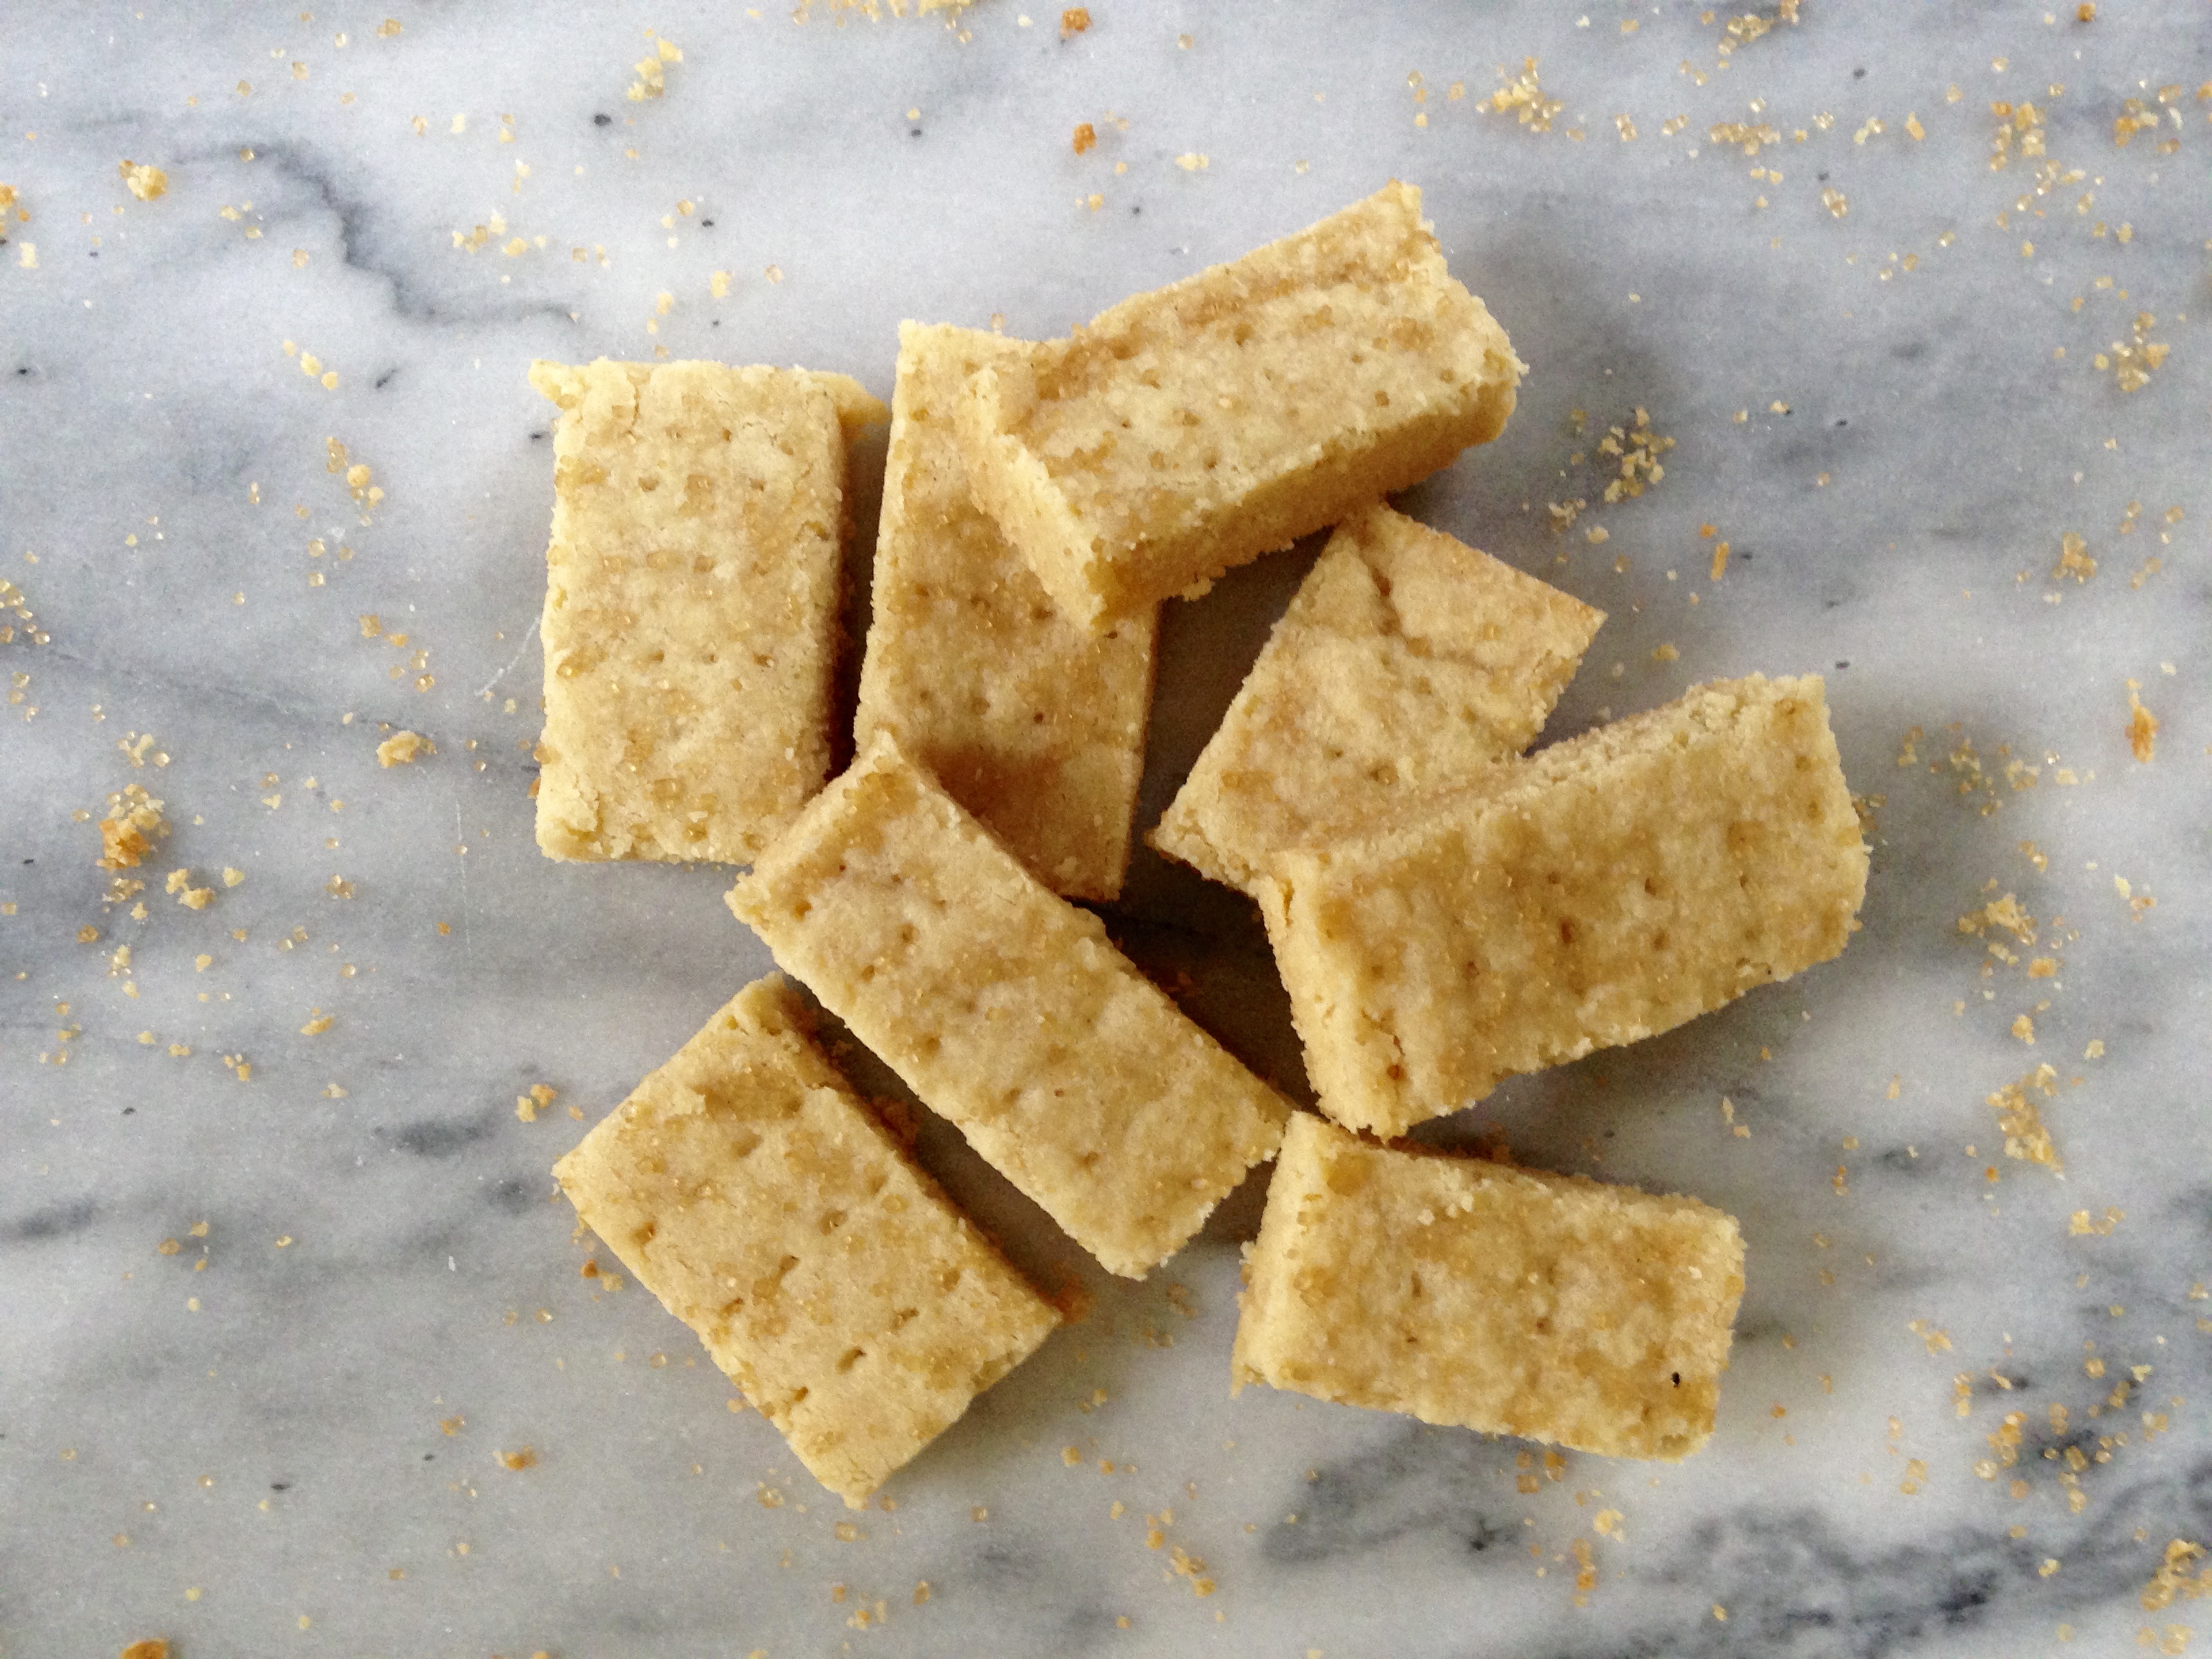
  • 1 oz. raw sugar, for dusting

Directions:

  1. Preheat oven to 285°F. Lightly grease your pan(s).
  2. Mix together the flour and semolina in a bowl. Add the butter and sugar and rub together with your fingertips until the mixture is just beginning to bind together. Knead lightly until the mixture forms a smooth dough.
  3. Press the dough into the prepared pans and level with the back of a spatula or a palette life, making sure the mixture is evenly spread. Prick all over with a fork and chill until firm.
  4. Bake for about 45 minutes, or until a very pale golden brown. Sprinkle with the raw sugar and leave to cool in the pan for a few minutes, then cut into fingers. Carefully lift the fingers out of the tin and finish cooling on a wire rack. Store in an airtight container.


Ginger Cookies

IMG_0943

Can you really call it the holiday season if the smell of ginger isn’t filling your kitchen?

Last year, I gave you a recipe for my gingerbread cookies — cookies that I bake every holiday season without fail. They’ll be making another appearance in my kitchen within the next couple of weeks without a doubt.

IMG_0933

I like these ginger cookies because they come out looking cracked and rustic, with a nice dusting of sugar on top. They have slightly crisp edges and are delightfully soft in the middle.

IMG_0952

I’ve found that a lot of ginger cookies don’t have much of a ginger taste to them. I upped the ante with these guys, including both ground ginger and chopped candied ginger. You’ll know you’re eating a ginger cookie, but the taste isn’t overwhelming.

IMG_0947

Ginger cookies for everyone!

IMG_0946

Ginger Cookies:
Makes 3 1/2 – 4 dozen cookies

Ingredients:

  • 1 cup sugar
  • 1 cup unsalted butter, room temperature
  • 1/4 cup molasses (dark)
  • 1 egg
  • 2 1/4 cups all-purpose flour
  • 1 1/2 tsp. baking soda
  • 2 tbsp. ground ginger
  • 2 tsp. diced candied ginger
  • 1 tsp. ground cinnamon
  • 1/4 tsp. salt
  • Sugar, for dipping

Directions:

  1. Mix sugar, shortening, molasses and egg together in a bowl. Stir in flour, baking soda, both gingers, cinnamon and salt. Wrap dough in plastic and refrigerate for at least 1 hour.
  2. Preheat oven to 350°F. Shape dough by rounded teaspoonfuls into balls and dip the tops in sugar. Place ginger dough balls, sugar side up on a parchment lined baking sheet, a couple of inches apart. Bake until edges are set (centres will be soft), about 10-12 minutes. Cool slightly on baking sheet, then transfer to a wire rack to cool completely.

Christmas Sugar Cookies


IMG_4445

Holiday baking season is finally here!

Baking is fun anytime of year, but there’s something special about all of the cookie swaps, snowflake/christmas tree/candy cane shaped cookies and everyone coming together to make a floury, sticky-frosting mess in the kitchen during the holidays.

IMG_4438

I love making these pillowy sugar cookies.

Sugar cookies have found themselves to be a predominantly “holiday” cookie, but you can switch up the flavours with different extracts (I like peppermint, almond and lemon), making them ideal for baking anytime of year.

IMG_4440

These cookies are so easy. The dough comes together in no time then you just refrigerate it for a while, roll it out, cut shapes and bake them.

IMG_4442

Then, it’s time to decorate! I like to use royal icing to decorate these because it’s pretty versatile. You can make it thicker to pipe outlines on cookies or loosen it up and “flood” your cookies to make fun designs which is what you normally see.

IMG_4447

Sprinkles, pearls, mini chocolate chips, coloured sugar and crushed candy canes are a must for your decorating needs. Put it on while your icing is still setting and they’ll stick on perfectly!

IMG_4462

You’ll get a lot of cookies out of this batch of dough. Feel free to freeze it for later if you don’t want to make too many at one time. 🙂

Sugar Cookies: 

Ingredients:

Cookies: 

  • 1 1/2 cups butter, softened
  • 2 cups sugar
  • 4 eggs
  • 2 tsp. vanilla extract
  • 5 cups all-purpose flour
  • 2 tsp. baking powder
  • 1 tsp. salt

Royal Icing: 

  • 3 ounces pasteurized egg whites
  • 1 tsp. vanilla extract
  • 4 cups confectioners’ sugar

Directions:

  1. In a large bowl, cream butter and sugar until smooth. Beat in eggs and vanilla. Stir in flour, baking powder and salt. Cover and chill for at least 1 hour.
  2. Preheat oven to 400°F. Roll out dough onto a floured surface 1/4-1/2″ thick. Cut into shapes.
  3. Bake for 6-8 minutes. Let cool completely, then decorate.
  4. In large bowl of stand mixer combine the egg whites and vanilla and beat until frothy. Add confectioners’ sugar gradually and mix on low speed until sugar is incorporated and mixture is shiny. Turn speed up to high and beat until mixture forms stiff, glossy peaks. This should take approximately 5 to 7 minutes. Transfer icing to pastry bag or heavy duty storage bag and pipe as desired. (If you want to thin out your icing, add a little water until it reaches your desired consistency).
  5. Finish decorating with any sprinkles, etc. you want. Enjoy!